Sales Tax for WooCommerce Sellers

Streamline sales tax compliance for your WooCommerce stores. Automate everything from tax calculations and returns to handling exempt sales.
Officially available on the Woo Marketplace. Install now
Thousands of customers trust TaxCloud
Accurate rates and TICs expertise
Easily start with TaxCloud — no special coding needed. Just assign the correct tax codes to your products, and TaxCloud handles the rest.
Focus on your business, we handle the taxes
No matter where or what you sell, we automate the filing and remittance process to keep you 100% sales tax compliant:
- Preparing and filing your sales tax returns.
- Ensuring timely remittance to the right jurisdictions.
- Managing your tax filings with comprehensive support.
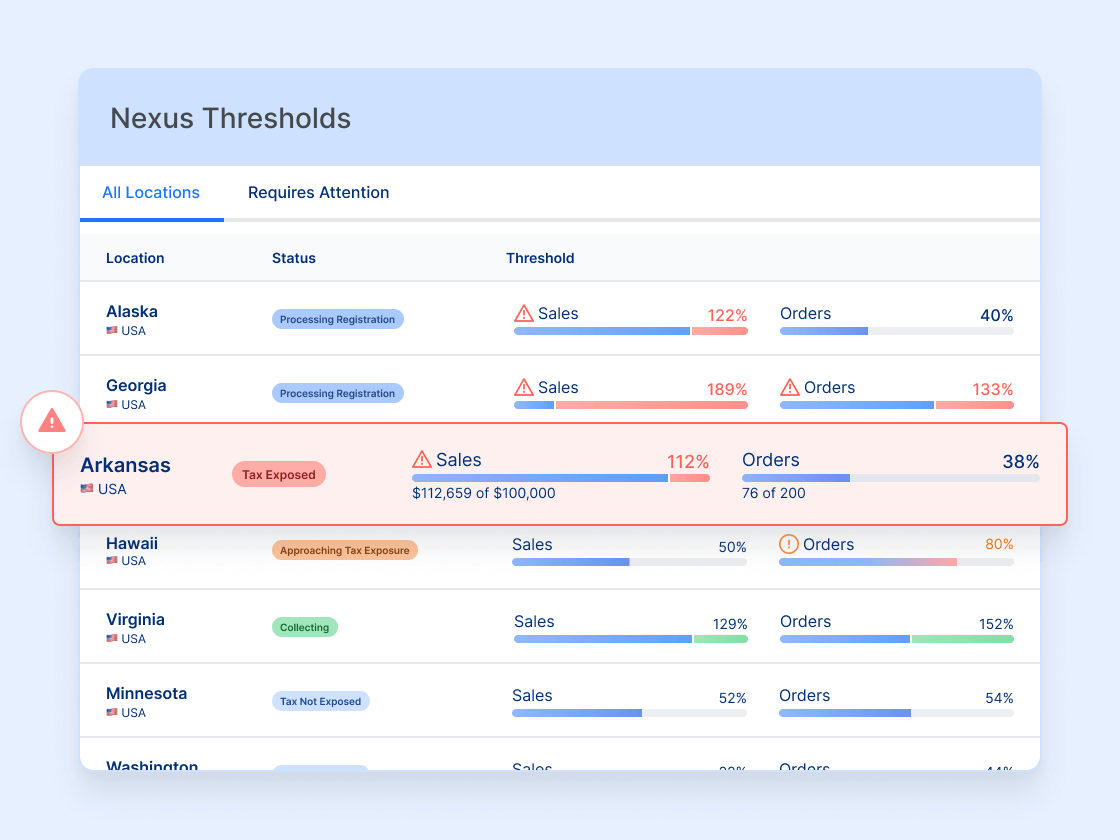
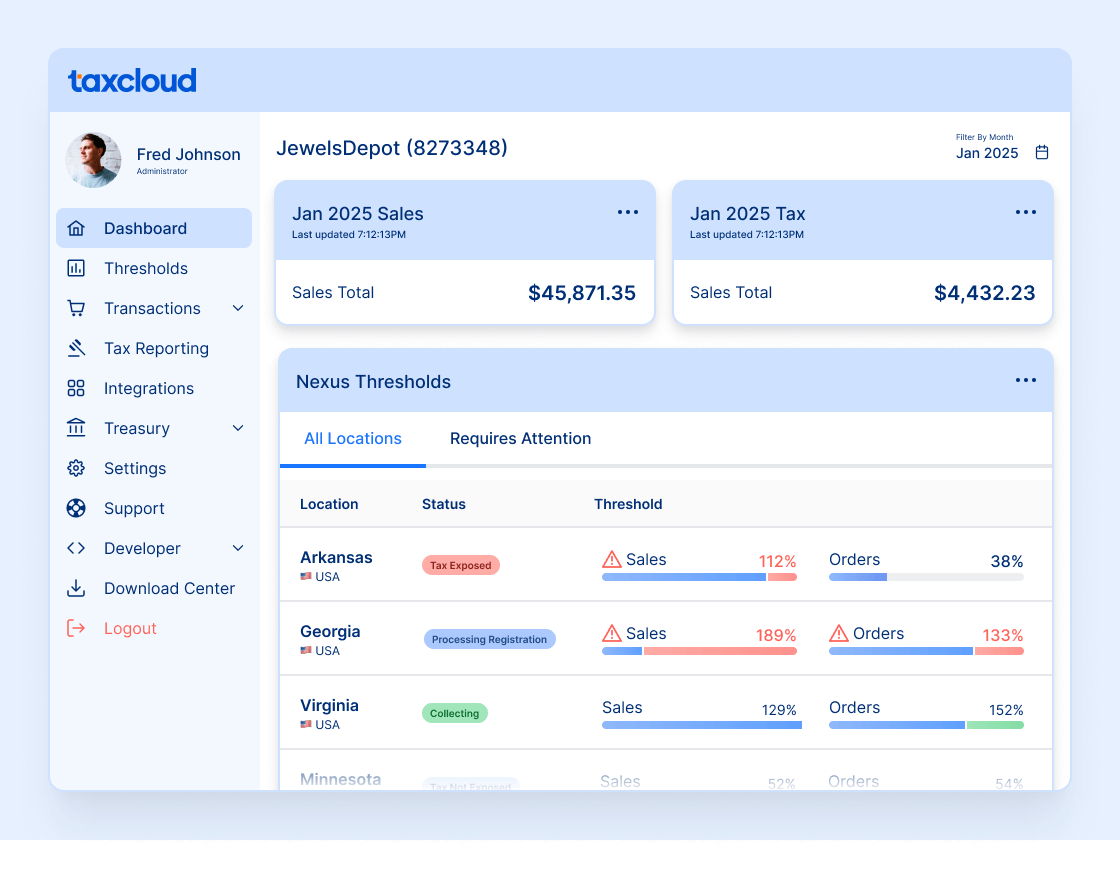
Economic nexus monitoring simplified
Unsure about where you need to collect tax? Send your sales report, and we’ll pinpoint your economic nexus status.

Dedicated US-based customer support
Experience top-tier email, live chat, and phone support from real people. Get personalized help from our knowledgeable team for all your sales tax questions.
Frequently asked questions
Exclusively available with our Premium plan, the WooCommerce integration is designed for businesses with more complex tax requirements.
It provides comprehensive support for multi-state operations, higher transaction volumes, and intricate compliance needs.
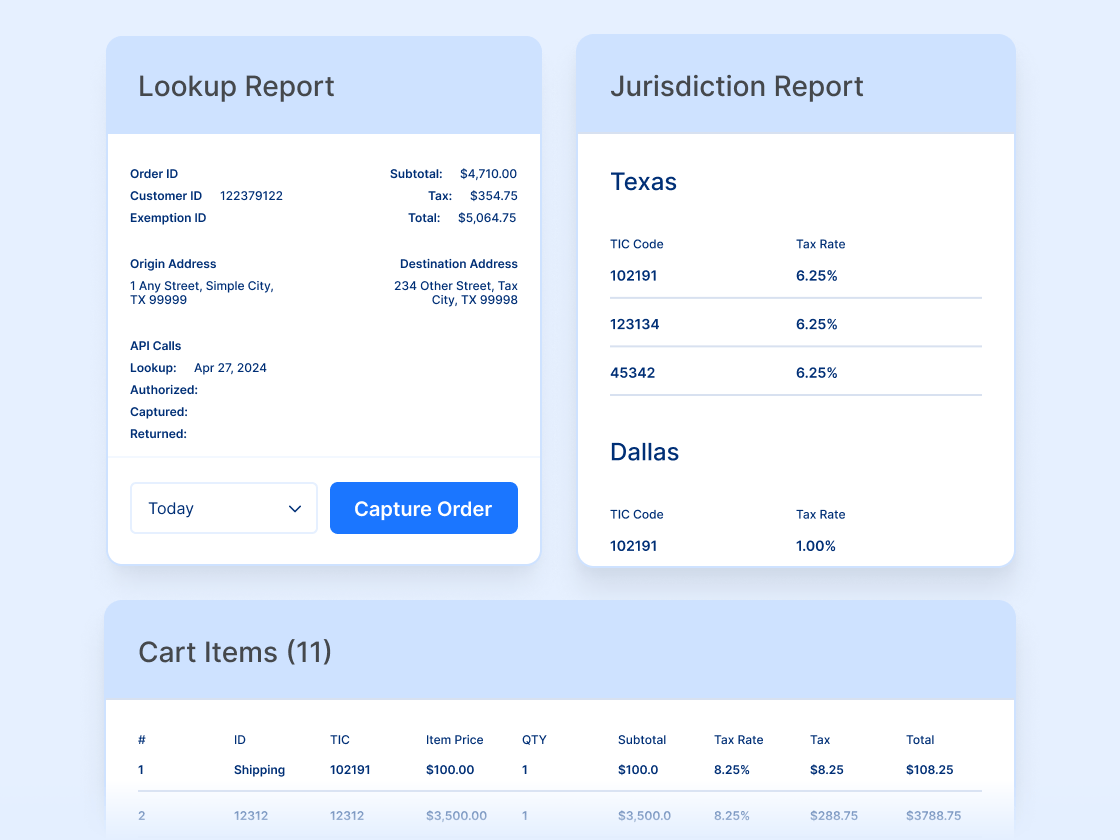
With precise sales tax calculations and seamless order information capture at the point of purchase, our integrations ensure robust automation and compliance, making them ideal for businesses with detailed tax management needs.
Please consult the TaxCloud pricing page for more details.
Yes. Simple Sales Tax is fully compatible with the official WooCommerce Subscriptions extension.
Unfortunately, WooCommerce itself doesn’t have sales tax settings so it can’t collect and remit sales tax for you. But WooCommerce does provide the technical capabilities for merchants to set up tax calculations and rates within their online store settings either manually or with the help of third-party compliance solutions. Merchants using WooCommerce are responsible for setting up their sales tax within the WooCommerce platform according to their sales tax collection obligations.
Merchants can easily automate the sales tax collection and remittance process by integrating a third-party sales tax software solution like TaxCloud. These apps handle everything from calculating, collecting, and even remitting sales tax in all the state and local tax jurisdictions you’re required to file sales taxes in.
TaxCloud can indeed support multiple stores including ones on platforms like WooCommerce, Shopify, BigCommerce, and more. It can handle your sales tax compliance needs across multiple companies or storefronts. This allows you to coordinate your compliance across your stores, all from one TaxCloud account.
TaxCloud’s WooCommerce integration is included in the Premium plan.