How to connect your QuickBooks Online account with TaxCloud
Steps to connect your QuickBooks Online account to your TaxCloud account:
- Sign in to your TaxCloud account.
-
Select Stores from the menu on the left side.
-
Add a new store by clicking the red +Add button in the upper right-hand corner.

-
Select QuickBooks from the dropdown menu under store type.
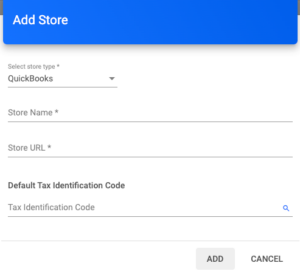
- If you sell items with taxability variations throughout the US, add a default Tax Information Code (TIC). Otherwise, add 0 for all fully taxable items. You’ll be able to add more TICs later.
-
After you’ve saved the new Store, you can link it to your QuickBooks Online account by clicking Link Store.

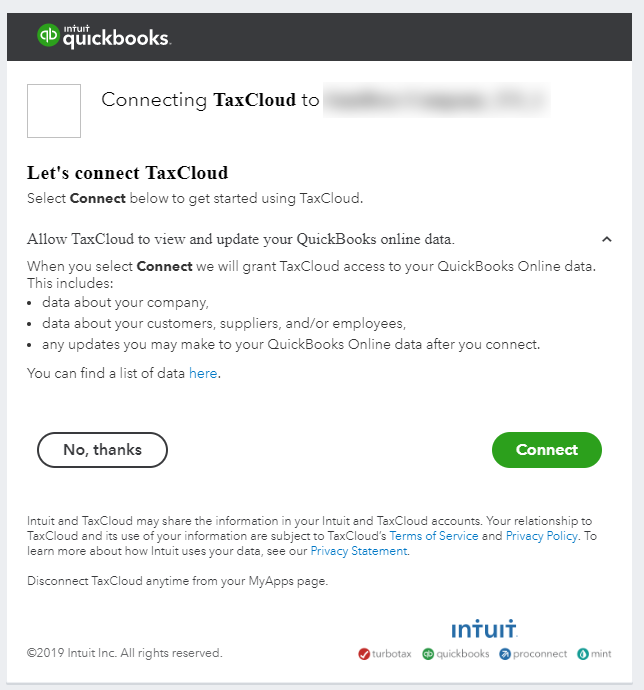
You will be prompted to log in to your QuickBooks account.
-
After you’ve entered your QuickBooks Online credentials, you’ll need to approve TaxCloud’s access to your QuickBooks Online account data by selecting Connect. TaxCloud will automatically extract the transactions at month’s end and recalculate sales tax to accurately file and remit the sales tax returns previously scheduled within TaxCloud.
-
Once QuickBooks is linked with TaxCloud, the “link account” button is hidden. Select Get Details on the Store to view more settings. Here you can turn off auto imports, manually import data outside of the automation schedule, or edit the store name and default TIC.

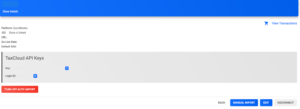
- After completing testing and when you are ready to submit live transactions, select the green Go Live button. Accounts already live will have a Go Live date displayed.
- NOTE: Test transactions are not included in tax reports or filed with the states.